A few months ago, I found a YouTube video that really caught my attention.
The title was perfect. The topic was exactly what I was looking for. The person clearly knew what they were talking about.
But within two minutes… I clicked away.
Not because the content was bad — but because the audio was.
There was background noise. The voice sounded far away. There was this hollow echo that made it hard to focus.
I tried to push through it, but it just wasn’t worth the effort.And that’s when it really hit me:
Bad audio can completely destroy good content.
If you’re reading this, there’s a good chance you’ve experienced something similar — either as a viewer or as a creator.
Maybe you’ve tried recording videos, podcasts, or voiceovers and thought:
- Why does my audio sound so low quality?
- Why is there noise even when my room is quiet?
- Why doesn’t it sound clean like other creators?
The truth is, most beginners struggle with audio — not because they lack talent, but because they don’t understand what actually makes audio sound good.
The good news?
You don’t need a studio. You don’t need expensive equipment. And you definitely don’t need complicated software.
You just need to understand a few key principles — and apply them correctly.
Let’s break it down in a simple, practical way.
Step-by-Step: How to Get Professional Audio (Even as a Beginner)
1. Understand What Actually Improves Audio Quality
When most people start, they think the secret to good audio is editing.
So they download apps. Try filters. Add effects.
But nothing really changes.That’s because good audio doesn’t start in editing — it starts during recording.
Real, clean audio comes from three main things:
- A quality microphone
- Proper mic positioning
- A quiet recording environment
If you get these three right, you’re already ahead of most beginners.
Everything else — editing, plugins, effects — is just support.
This is where many people go wrong. They try to fix bad audio after recording, instead of getting it right from the beginning.
2. Choose the Right Type of Microphone
One of the biggest mistakes beginners make is choosing the wrong type of microphone.There are two common types:
Condenser Microphones
- Very sensitive
- Pick up everything — including background noise
- Best for treated studios
Dynamic Microphones
- Less sensitive
- Focus more on your voice
- Reduce background noise
If your room is not soundproof (which is normal for most people), a dynamic microphone is usually the better choice.
Why?
Because it helps you avoid common problems like:
- Fan noise
- Echo
- Street sounds
- Keyboard clicks
This doesn’t mean condenser mics are bad — they’re just not beginner-friendly in most home setups.
Choosing the right type of mic alone can save you a lot of frustration.
3. Position Your Microphone Correctly
Even if you have a good microphone, it won’t sound good if you use it the wrong way.
Mic positioning is one of the simplest things you can fix — but also one of the most ignored.
Here’s what you should do:
- Keep the mic close to your mouth (about 2–6 inches)
- Speak slightly off-axis (not directly into it) to reduce harsh sounds like “P” and “S”
- Stay at a consistent distance while recording
Also, avoid recording in large empty rooms.
Why?
Because empty spaces create echo. Your voice bounces off walls and comes back into the mic, making your audio sound distant and unprofessional.
A small adjustment in positioning can instantly improve your sound.
4. Use Simple Sound Control Tricks
You don’t need a professional studio to get good audio.
In fact, some of the best beginner setups are surprisingly simple.
👉 Try these easy improvements:
- Record in a room with curtains, carpets, or rugs
- Sit near soft surfaces like a bed, sofa, or even clothes
- Avoid hard, empty spaces
- Turn off fans, AC, or noisy devices when possible
Some creators even record inside closets — not because it’s fancy, but because clothes absorb sound and reduce echo.
The goal is simple:
👉 Reduce reflections and background noise.
Once you do that, your audio becomes clearer immediately.
5. Use a Reliable Beginner-Friendly Microphone
At some point, using the right microphone makes everything easier.This is where many beginners get stuck.
They ask:
- “Which mic should I buy?
- What works with my laptop or phone?
- Do I need extra equipment?
The key is to choose something that is:
- Easy to use
- Compatible with your setup
- Not too technical
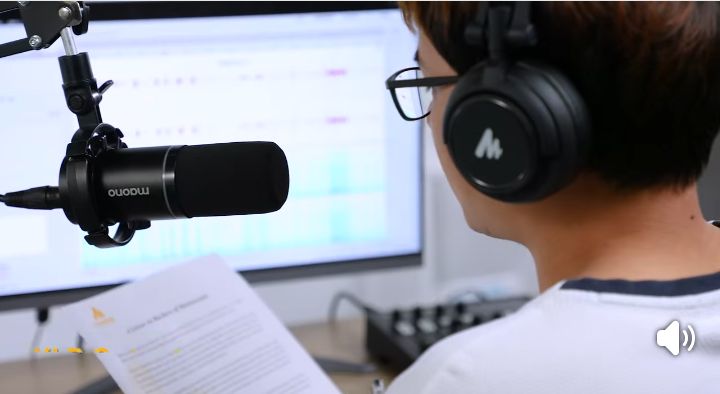
A good example of this type of microphone is the Maono PD200X dynamic microphone.
It fits naturally into a beginner setup because:
- It supports USB (plug-and-play) — no complicated setup
- It also supports XLR, which means you can upgrade later
- It has a tap-to-mute button, useful for live sessions or streaming
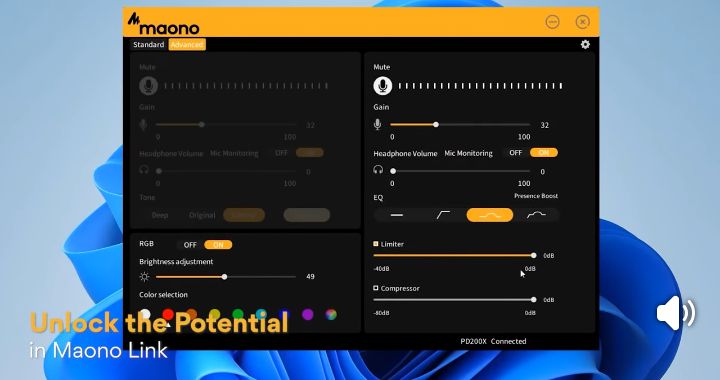
- It includes a gain knob, so you can control your audio levels easily
What this means in real terms is simple:
This simply means that, you spend less time struggling with setup, and more time creating content.
If you’re curious about Maono, you can check it here.
But it’s important to say this clearly — the tool is not the magic.
Even with a simple mic, if you apply the steps above, your audio will improve significantly.
Pros and Cons (Honest Breakdown)
Before choosing any tool, it’s always good to understand both sides.
✅ Pros:
- Beginner-friendly (no technical stress)
- Dual connection (USB + XLR for future upgrades)
- Strong build quality (durable metal design)
- Good at reducing background noise
- Built-in controls (mute and gain adjustment)
❌ Cons:
- Not the cheapest option for beginners
- You may need a stand or boom arm for best results
- It won’t completely fix a very noisy environment
This is important because many people expect a microphone to solve everything — but your environment and setup still matter.
Helpful Tips Most Beginners Ignore
These additional small details can make a big difference:
- Always monitor your audio with headphones. Don’t assume it sounds good — listen and confirm.
- Avoid recording too loud—Loud audio can distort and become unpleasant.
- Use editing tools lightly — Noise reduction helps, but don’t rely on it to fix everything.
- Focus on clarity, not loudness — Clear audio is more important than volume.
- Upgrade slowly. Don’t rush to buy expensive gear — improve step by step.
Conclusion:
Here’s the truth most people don’t realize:
👉 You don’t need expensive equipment to sound professional.
What really matters is:
- Understanding the basics
- Using the right type of microphone
- Positioning it correctly
- Recording in a controlled environment
Once you get these right, everything becomes easier.
If a microphone like the Maono PD200X fits your setup, that’s great — it can simplify your process and help you get started faster.
If not, that’s perfectly fine too.
Because at the end of the day, these principles work with almost any decent microphone.
Start simple. Improve gradually. Stay consistent.
And most importantly — focus on your message.
Because clear audio doesn’t just make you sound better.